Crafts | Kids | Kids Crafts
DIY Glitter Gems & Magnets
As an Amazon Associate, I earn from qualifying purchases. This post may contain affiliate links. See our full disclosure here.
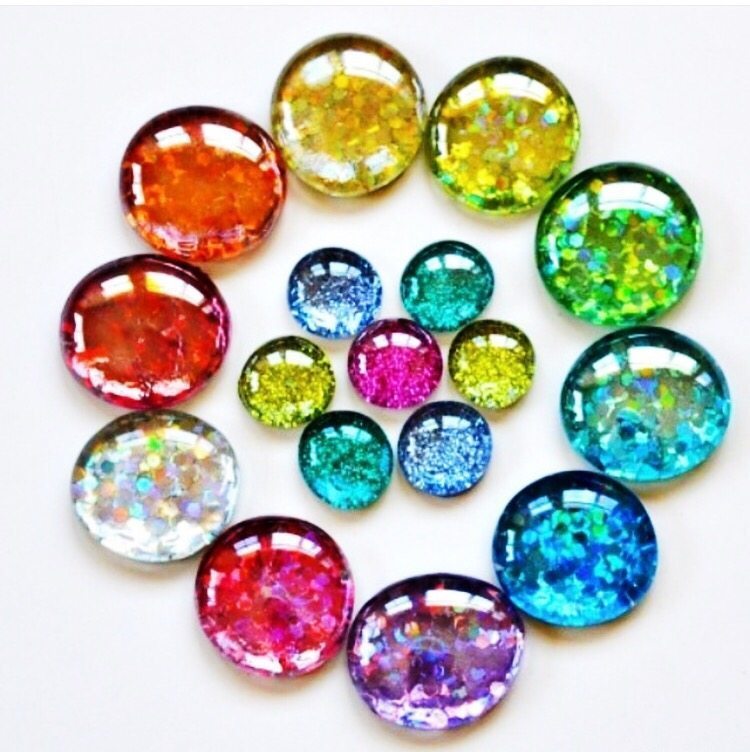
I’m making a treasure box for my son, and I wanted to make my own gem treasures to decorate the box with and put inside as a surprise. As it turns out, these glitter gems also make great magnets. This is the post that I found for inspiration.
(This post contains affiliate links to Amazon for your convenience.)
Here’s what you need for this project:
- Glitter – For the large gems I used hexagonal glitter. You can find other shaped glitter here. For the smaller gems I used Recollections Extra Fine Glitter.
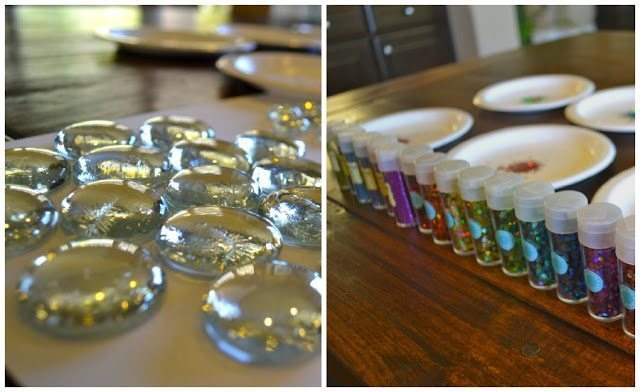
- Large and small glass stones, rounded on one side and flat on the other. I bought mine at the craft store.
- E6000 glue (if you are doing this project with children, I recommend using another glue).
- Mod Podge or other sealant
- Foam brush – I use these brushes for everything!
- Scrapbook paper
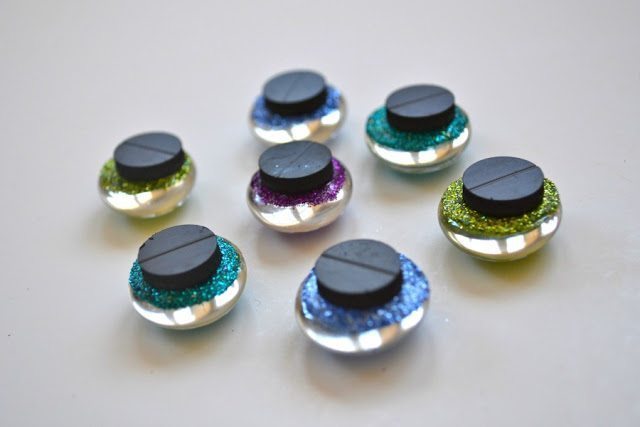
- Magnets (optional) – make sure you choose a magnet that’s strong since the gems can be heavy.
Steps for making glitter gems & magnets:
- Cover the flat side of a gem with E6000 glue. I used a foam brush to apply.
- Dip the flat side of the gem that you just covered in glue into the glitter.
- Let dry. I waited several hours.
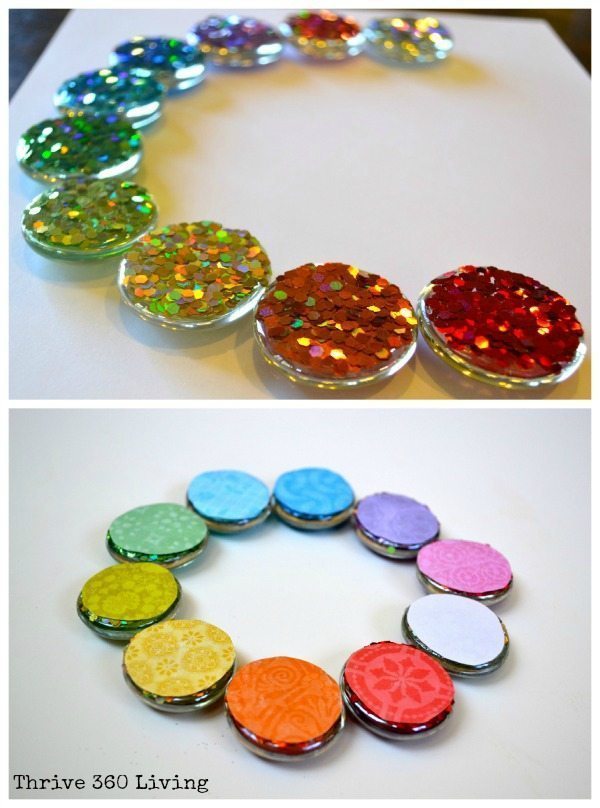
- Apply a layer of Mod Podge over the glitter to seal it into place.
- For the large gems I also Mod Podged a piece of scrapbook paper to the back. I wanted to make sure they were play-friendly since they are going into the treasure box I’m making Jake.
- To turn the gems into magnets, use your E6000 glue and apply a strong magnet.
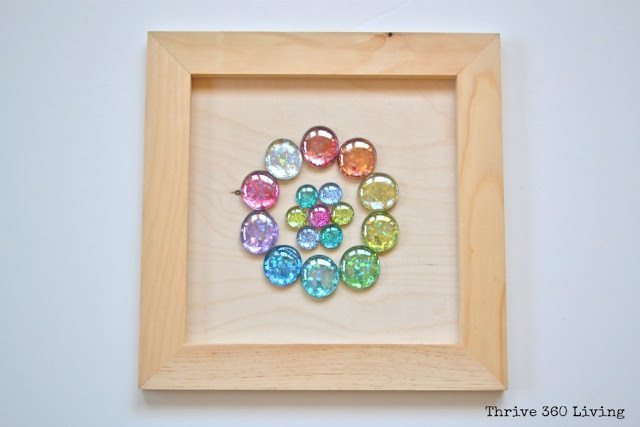
I might have to make another set of these gems because I think they would look great glued to this wood frame. Perfect for my art room.
My new motto after this project is “when in doubt, just add glitter.”

If you like glitter gems, check out these cracked gems that I made. They are perfect for making your own DIY jewelry. 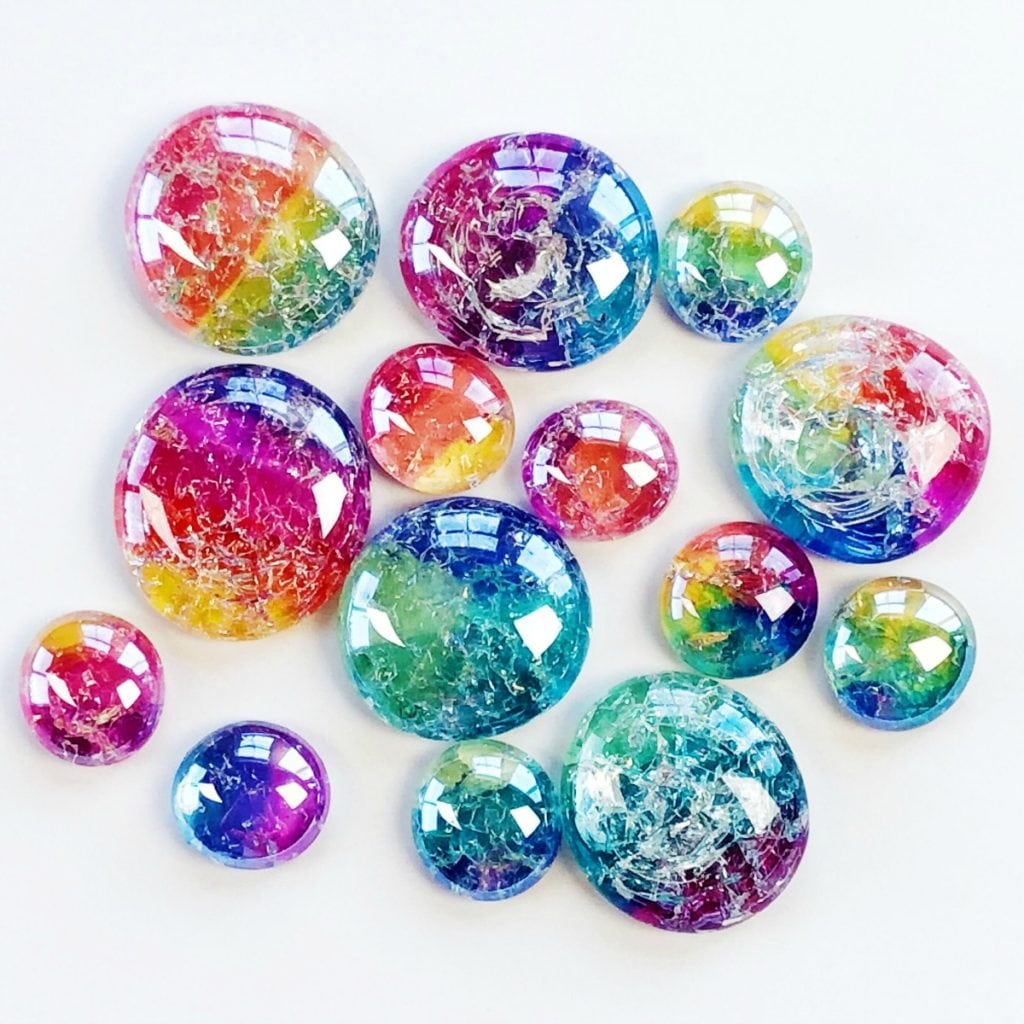
WAIT . . . don’t go yet. Have you liked Thrive 360 Living on Facebook yet?
Check out my page, and you’ll see other fun projects and posts that you won’t find on the blog.

You’ve set my creative juices running again Thank you xxPat
Yay!! I’m so glad.
Loved this glitter and magnet on the clear stones.
Thank you so much!! They are so fun to make.
I’ve just got a ton of these stones given so here is my first project Thankyou xx
YAY! Can’t wait to see your creations.
What glue do you recommend for kids to use?
That’s a tough one. I tried these with mod podge but the glitter really didn’t adhere as well and other glues don’t dry very clear. Maybe you can do the glue part and just let the kiddos do the dipping in the glitter part!
Why not just glue glitter cardstock to the flat side if the stones. It is less messy and you can get a lot of circles cut in proportion with a round cutter. You can always paint the white side black, then midge pudge that and it will blend with the black magnet.
That’s a great idea too! I just happen to really like this large hexagonal glitter. You can see the pretty shapes.
Gracias…tus manualidades están hermosas y las explicaciones son muy claras, detalladas y sencillas. Las pondré en práctica.
Your post definitely made me smile. I can feel your happy energy in your post. I recently became disabled and was looking for something to do that was budget friendly that could give a few to friends and not be giving away much money. I am so gonna try this. Thank you for your easy to understand instructions.
You are so sweet. Thanks for the lovely message!