Thanksgiving Painted Rocks
As an Amazon Associate, I earn from qualifying purchases. This post may contain affiliate links. See our full disclosure here.
With Halloween behind us, everyone is starting to think about all the fun (and yummy!) traditions Thanksgiving holds. Every family is different, but we think we have a Thanksgiving craft that is bound to be a family favorite. Not only is this Thanksgiving painted rocks craft fun, but it’s easy and simple. (And oh so colorful!)
Cute DIY Thanksgiving Painted Rocks Idea
Thanksgiving is one of our favorite times of the year and what better way to celebrate than to spend time together painting rocks. These colorful fall painted rocks are a favorite craft here at Color Made Happy and we have no doubt you’ll love them too. This is one of our favorite activities for Thanksgiving and it’s a great way to involve your whole family in a craft.
(Tip: In fact, you can even pre-paint the rocks before your Thanksgiving celebration and have all of your guests write down what they’re thankful for on the back of the rock). It’s a fun way to do an easy, stress-free activity and one that your guests will love.)
Supplies for Thanksgiving Painted Rocks
(affiliate links provided for convenience)
- Rocks – If you can’t find any outside or at your local garden center, check out Amazon here, there’s a huge selection to choose from.
- Paint Pens
- Acrylic Paint
- Small Paint Brushes
- Black Fine Liner Pens – I use these pens for outlining images and adding face details.
- Sealant – sealant for a glossy finish.
How to Paint Colorful Thanksgiving Rocks
1. Clean off the Rocks
You’ll want your surface to be as clean and smooth as possible. Wash off the rocks and let them sit in a dry place until they’re dry. If you try painting them when they’re even a little bit wet, the paint might not stick.
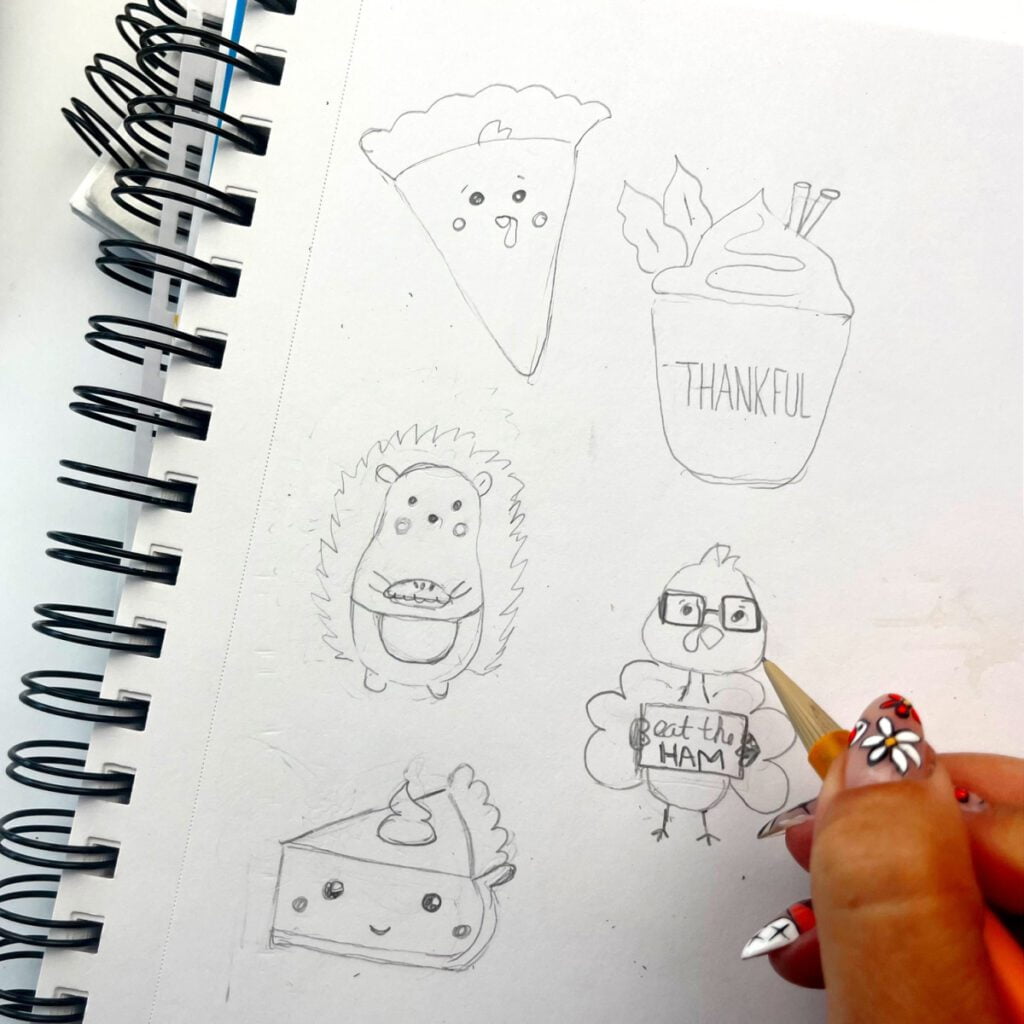
2. Plan Your Designs
Sketch your designs first on a piece of paper. I find it easier to have an idea before I start drawing on the rocks.
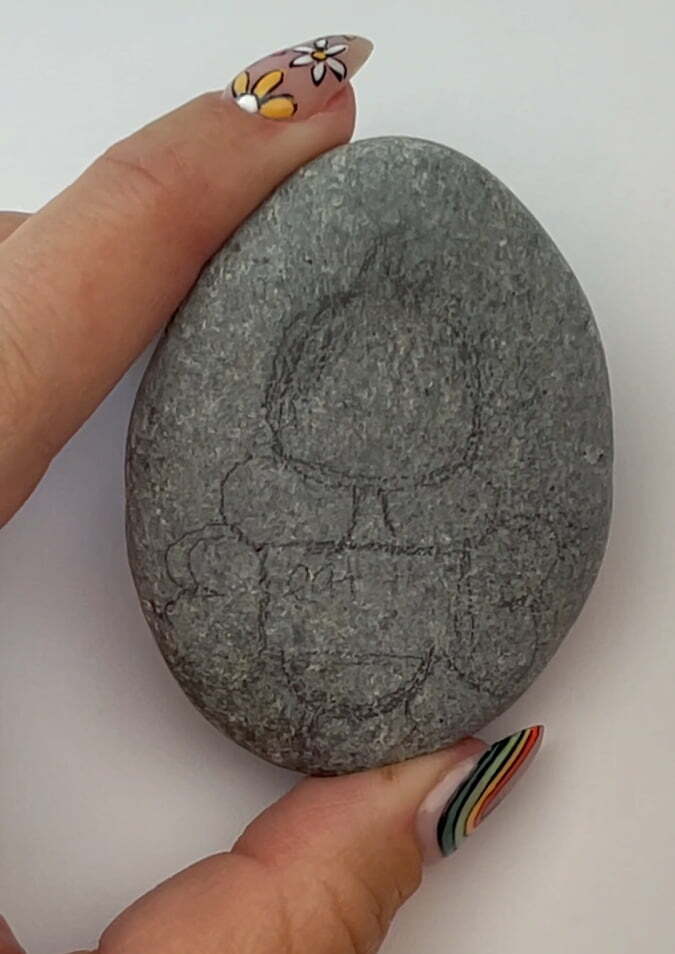
3. Sketch on the Rock
Then sketch an outline with pencil onto the rock. You don’t have to worry about details yet, you just want the basic outline on the rock.
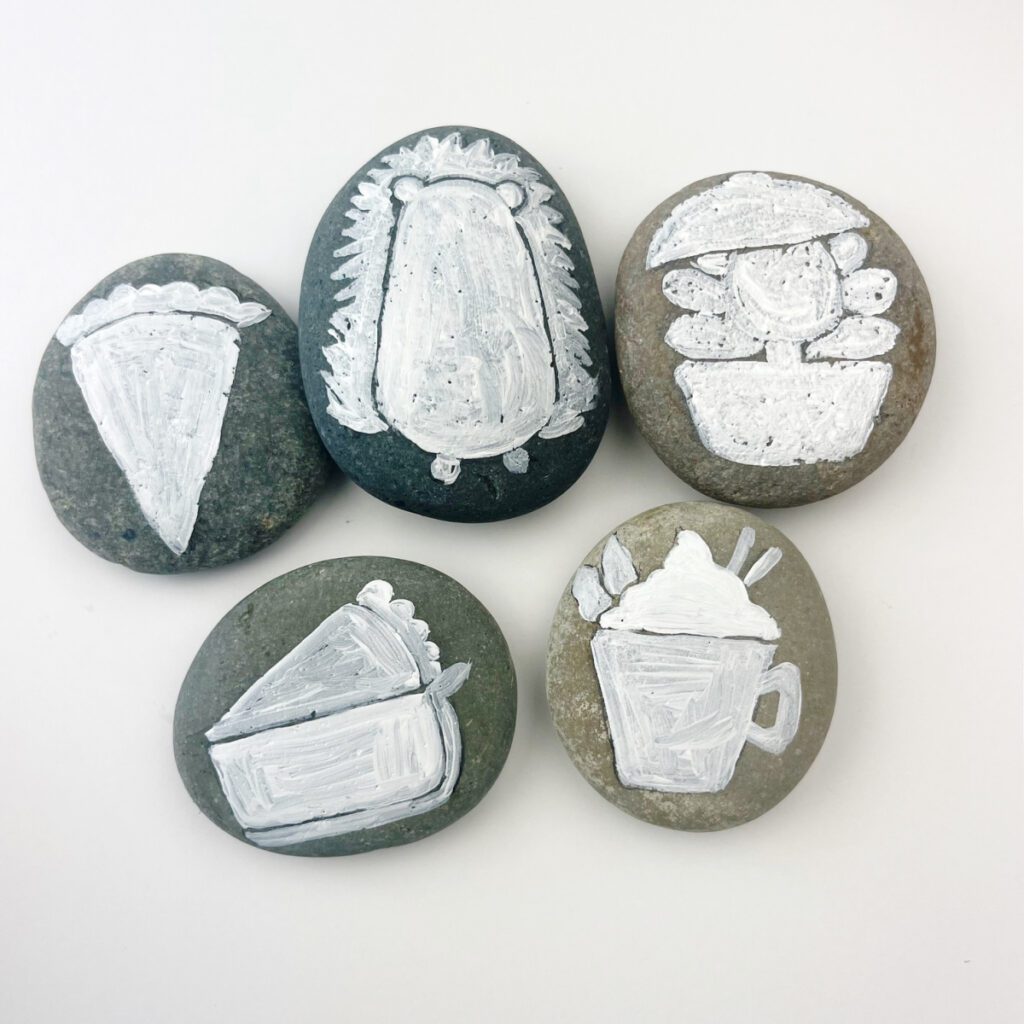
4. Apply a Base Coat of White Paint
Using white acrylic paint, fill in the outline on your rock. This step will help make the colors pop when you add them to the rock. Especially on darker rocks this step is important!
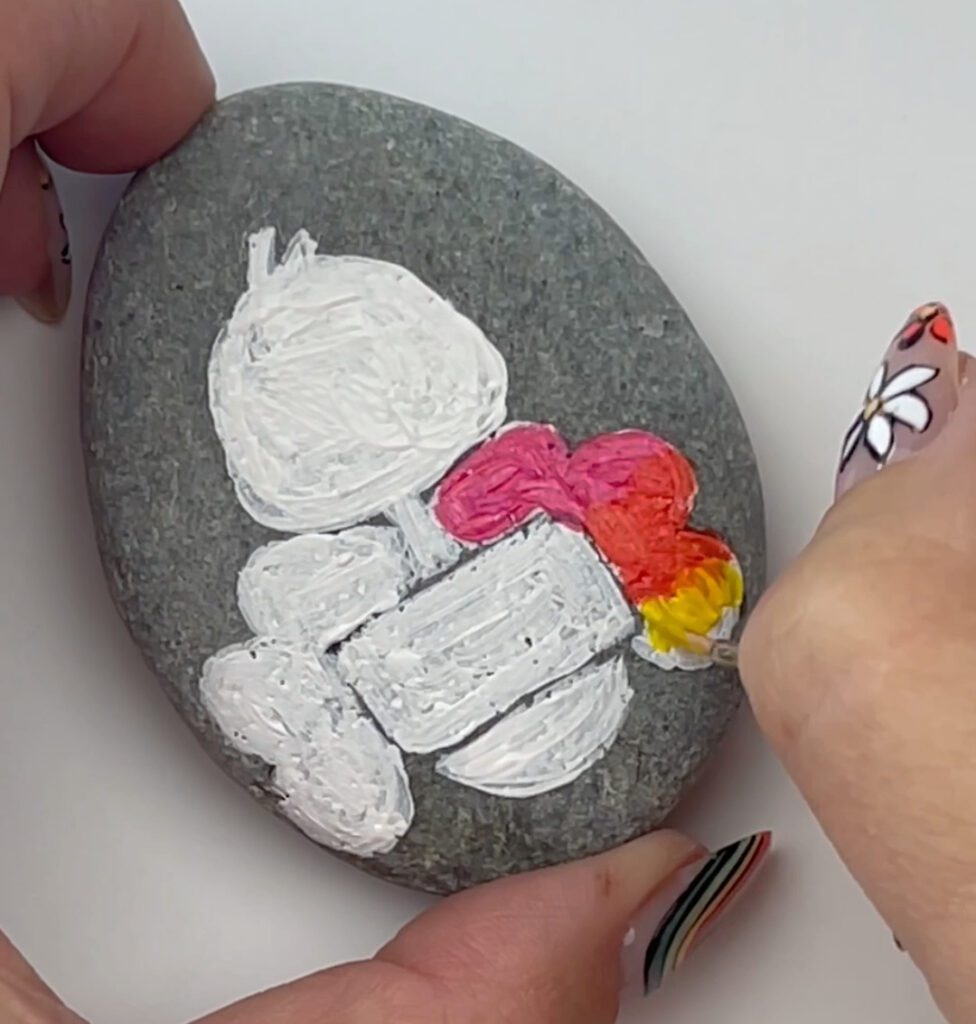
5. Fill in Your Design
Fill in the white outline with color using acrylic paint and/or paint markers.
6. Add Details
If you want to put more details on your design wait for the first layer of paint to dry first. Then use a fine brush or paint marker.
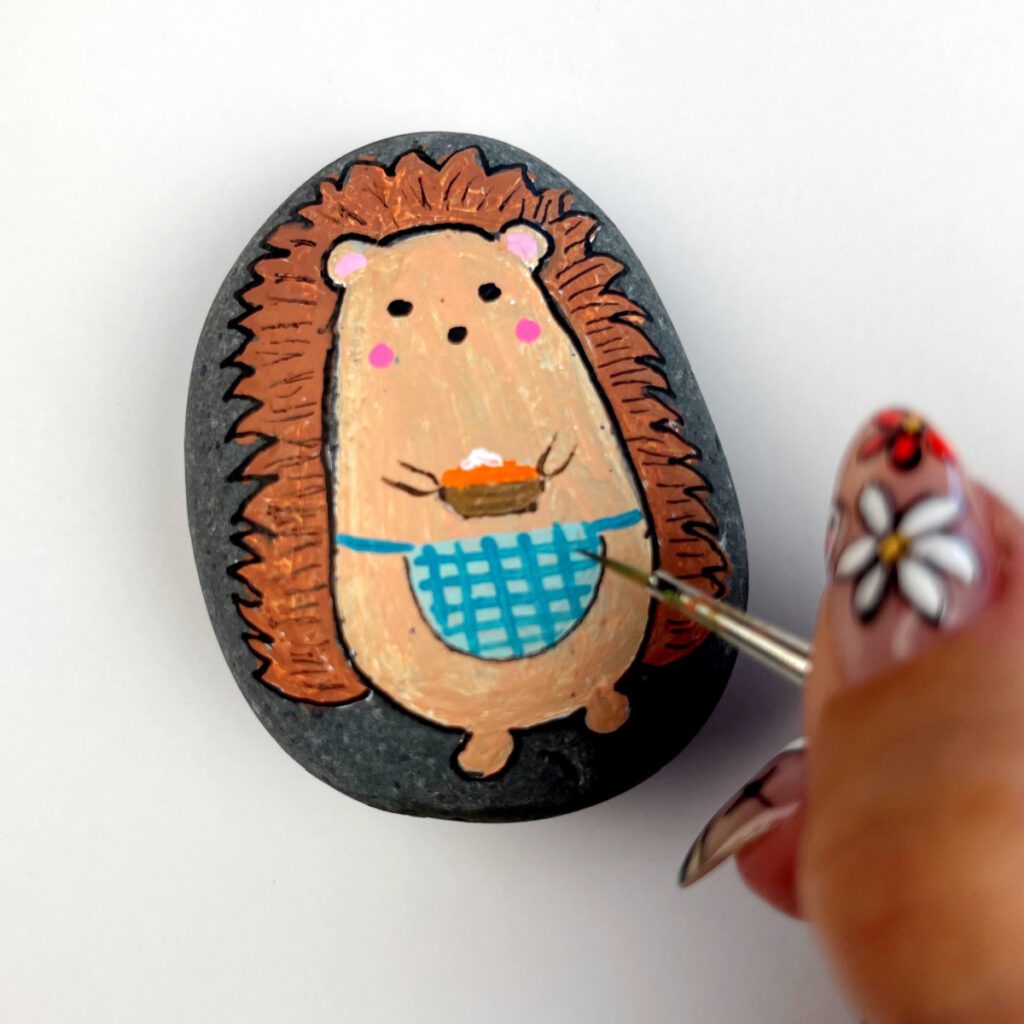
7. Outline the Design
Use a black fine liner pen to outline your design and fill in any details.
8. Seal the Rocks
Once your Thanksgiving painted rocks are complete, you can seal your rocks with a spray sealant.
Easy Thanksgiving Painted Rocks – Quick Step by Step
- Clean the rocks or purchase them pre-washed.
- Sketch out your designs onto a piece of paper.
- Draw your designs on the rocks.
- Fill in the design with white acrylic paint. Let it dry.
- Use paint or paint markers to create your design.
- Add fine details after the previous coat has dried.
- Outline the design with a black paint marker.
- Seal the rocks with a spray sealant.
What to do After Painting Thanksgiving Rocks
On the back of the rocks you can write out what you’re thankful for. Whether you decide to paint a bunch of fall painted rocks for the Thanksgiving table for your guests to write on or whether you make it a craft with just you and your kiddos, this is a perfect way to reflect on all the things you’re grateful for. In fact, there are some who might run out of rocks because of all the things they’re grateful for. Be sure to keep plenty of rocks on-hand for everyone to paint throughout the whole day.
Keep them somewhere special– This is one craft you’ll want to keep year after year. Whether you fill up a jar with rocks or line them up on your windows, you’ll want to keep this someplace where you can look at it and remember all those Thanksgiving memories.
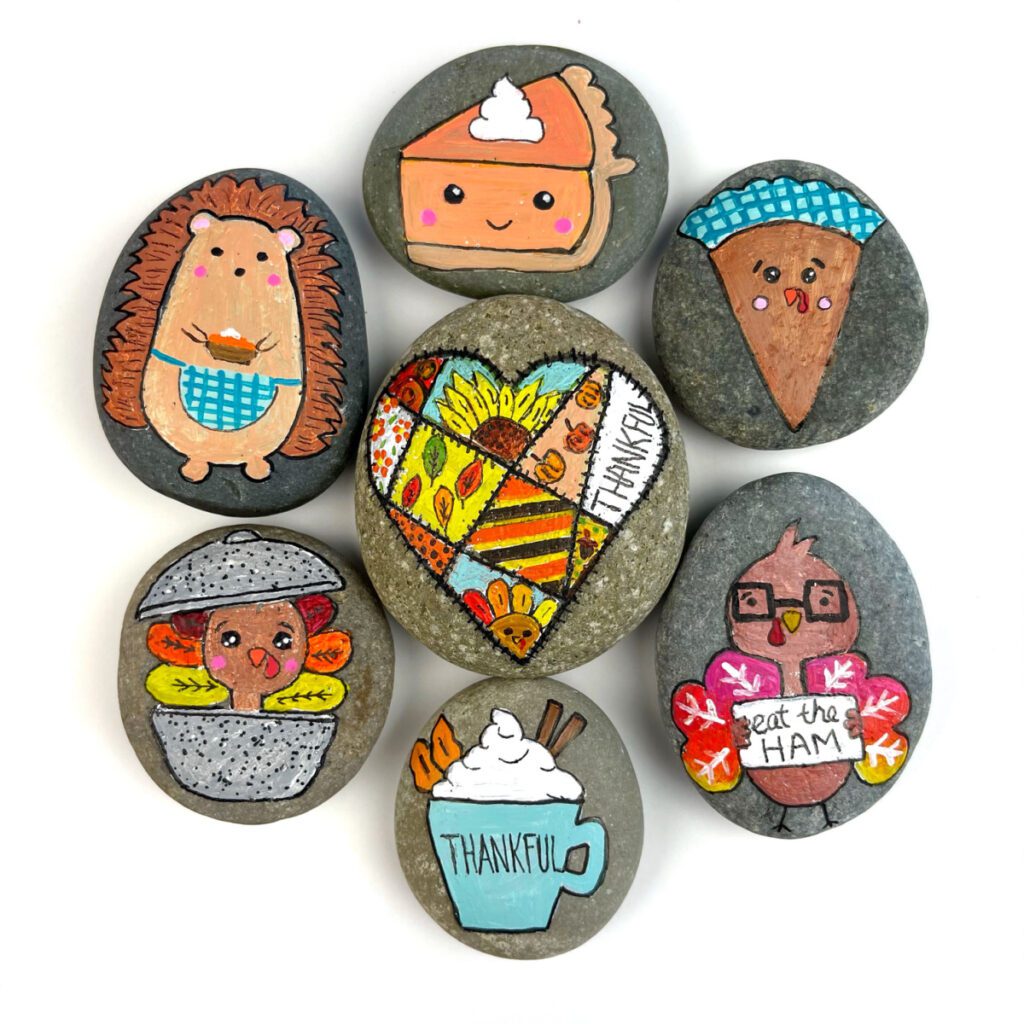
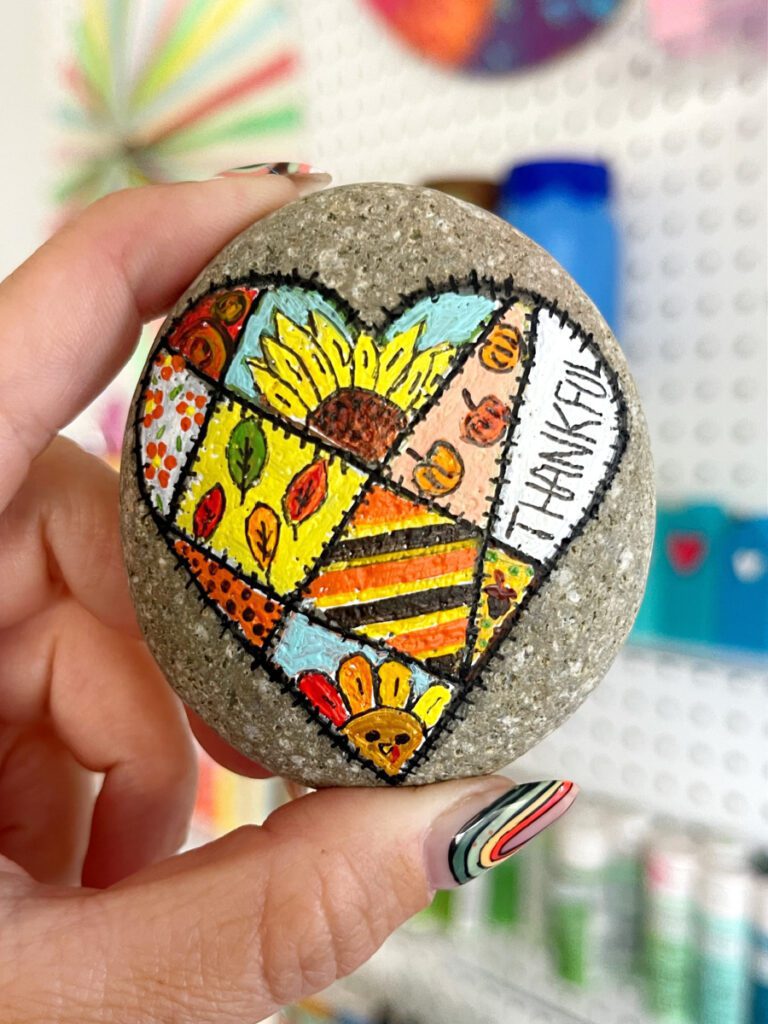
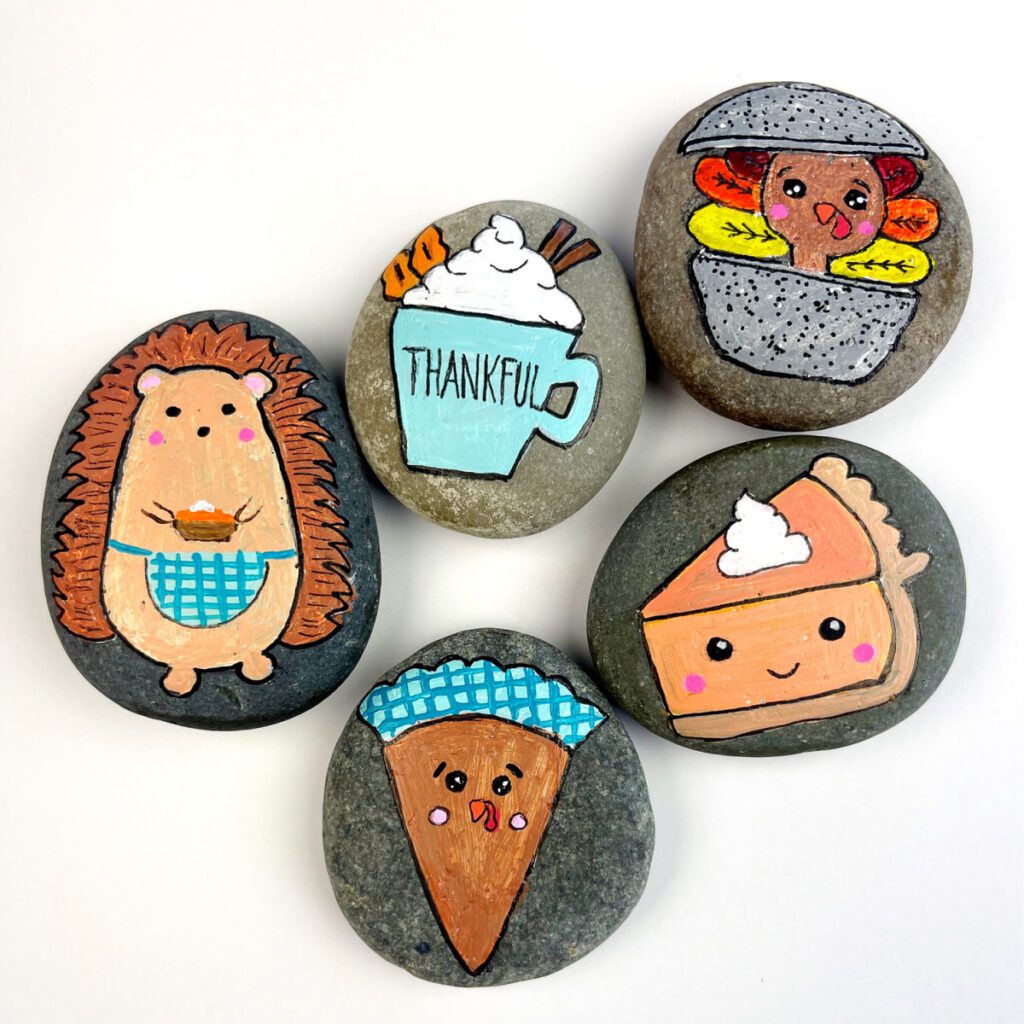
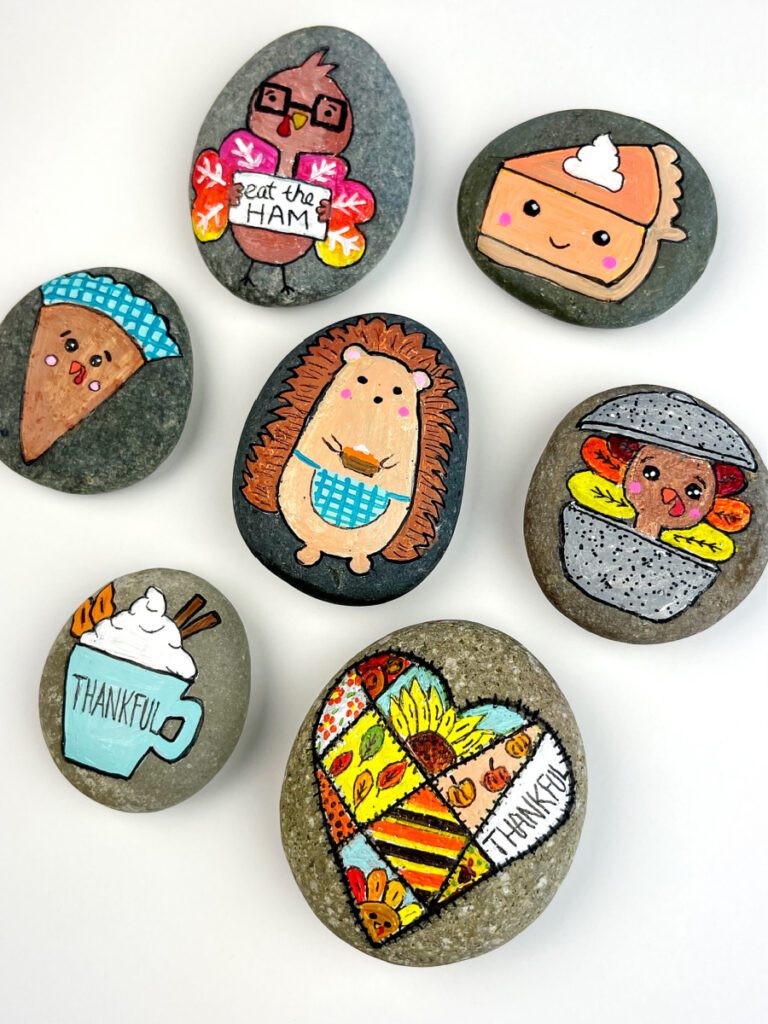
Thanksgiving Rock Painting Ideas
Here’s some Thanksgiving themed rock painting inspiration for you! You can come up with your own designs or recreate one of these with your own unique style.
And that’s it! This craft is so easy it’s guaranteed to be a family favorite year after year. Not only is it cheap, it’s colorful and simple. We know how busy the Thanksgiving season can get so we’re all about keeping it so simple you can do it in less than an hour.
(Tip: You can even make it a competition to see who can get the most creative with their painted rock or have your guests paint what they’re grateful for instead of writing it on the rock. Have a game where you see who can guess what everyone else is grateful for. It will have all your guests laughing and having a blast in no time!)
Looking for more Thanksgiving crafts ideas? Check out these Thanksgiving Turkey flower pots. Be sure to tag us on social media if you decide to do this fun, colorful craft. We can’t wait to see where your creativity takes you! And as always, thank you for being part of the Color Made Happy community. Enjoy your holiday and be safe!